Latest News and Articles From the A & T Carpentry Blog
How To Fit an Internal Door Handle
Fitting an internal door handle may seem like a relatively easy DIY task, but it is worth doing properly. A badly fitted door handle will cause your door to stick or not close correctly. An old or worn door handle may drop when not in use or squeak every time the door is opened. The good news is that once you know how, fitting a replacement door handle is easy, and you be done in minutes.
Tools You Will Need
Tools needed
To fit an internal door handle, you will need:
- Tape measure
- Set square
- Pencil
- Screwdrivers with various head types
- Wood chisel
- Wooden Mallet
- Bradawl
- Drill
- Wood drill bits
- Pilot drill bit
- Dust sheets
Time Required: 10-20mins.
Internal Door Handle Fitting
These steps assume that you are fitting your door furniture to a new door. If you are replacing and old or worn handle you will not need to follow all of the steps below. These instructions can be used to fit an interior door handle. A simple latch and striker plate is not secure enough to use on an external door and will not lock securely.
How To Fit
- Cover the area around the door with dust sheets.
- Measure the point where you want the door handle to be, and mark this locations centre point.
- Use a set square to draw a line around the door at the height that you want the latch to go. This line will be used as a guide to make sure that the door handle is straight.
- Measure the depth that you want the latch to go.
- Put some coloured electrical tape around the drill bit to mark that latch depth.
- Drill a hole in the narrow edge of the door at the height where the door handle should be. Stop drilling once you reach the depth marked by tape on the drill bit.
- Hold the latch plate over the hole in the door, so that you can see the hole in the door through the latch plate.
- Draw around the latch plate using a pencil.
- Remove the latch plate. Using a hammer and chisel, remove a small amount of wood within the marked area, cut out enough wood to allow the the latch plate sits flush against the door.
- Drill through the door using a hole saw or spade drill bit to make a hole all the way through the door at the point where the door knob will go.
- Put the latch plate back in place and mark the screw holes using a pencil. Drill holes at those points using pilot drill bit.
- Insert the latch, and then screw the latch plate in place.
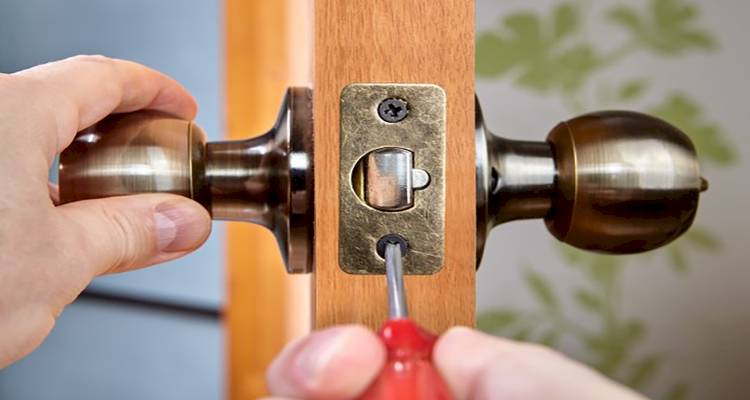
- Door knobs and door handles usually come in two separate pieces. Insert one side into the door, then put the other side in place, taking care to correctly line up the screw holes and the central locking mechanism.
- Screw the two pieces of the door handle together.
- Test the handle to make sure it is working properly. Turn the handle to make sure it activates the latch and allows the door to open and close.
- Measure the position of the latch, and line the striker plate on the door frame. Test the position carefully to make sure that the door closes correctly.
- Trace around the striker plate with a pencil.
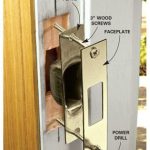
- Chisel out the wood in the area you have marked, so that the striker plate fits flush into the door frame. Drill a hole into the wood in the area where the latch will fit.
- Screw the strike plate, and faceplate, if one was provided, into the door frame. Test the door to make sure everything moves smoothly. Adjust the strike plate if necessary
That’s it! Following these steps will allow you to install an internal door handle quickly and easily.
A Few More Tips
Door handles sit at a height of 990mm which ensures that they are easy for most adults and older children to reach. You may of course place your handles higher or lower.
To make surethat the latch fits flush against the door, chisel out the wood by putting your chisel against the pencil lines you have marked, and tapping very lightly with a mallet. Outline the area of wood that you need to remove, and then remove thin slices of wood by placing the chisel bevel side down and tapping it with your mallet.
If you are chiseling with the grain and feel that the wood grain is directing the chisel too deep into the wood, stop and chisel from the opposite direction. Work slowly. It is better to remove too little wood than too much. You can always sand down excess wood, but it is much harder to put the wood back!
Don’t leave the striker plate sticking out proud. This will make the plate wear down more quickly, giving it a scratched and unappealing appearance, and will cause the door to stick when opening and closing.
Contact A & T Carpentry
A & T Carpentry would love to hear about your project. Why not tell them about your home decor project or renovation plans. They are always on hand to offer free friendly advice and a competitive quotation.
Recent Comments